Tuesday, October 23, 2012

Quickie Project - the painted pumpkin

I finished a few projects last week for a client, and started a beautiful vanity. I'm one coat into it so far. The next step involves flipping it over, so I can get the feet and hard-to-reach under spots. Might have to wait for my muscle man to get home for some brawny help.

In the meantime, I found this little clay pumpkin at a consignment shop this afternoon for $3.00.


So, it came home with me, and about 30 minutes later it looked like this...


First, I painted an undercoat of ASCP in Coco, then did a coat of Old White. I painted this in my warm house and I swear each coat dried in about 2 minutes! Then I clear waxed the whole thing, distressed a whole bunch, and slathered that puppy in dark wax. After I wiped it away, I rubbed it back even further with a bit of clear wax, until it was just the right shade of dirty white.

This fast & easy project was a nice change from the time-consuming ones that furniture can be. Yay for quickies!  ;-)


Thursday, October 11, 2012

Making a Sweater Pumpkin

I've seen sweater pumpkins all over the internet and Pinterest. They are adorable, especially when made in several colors and textures. And they look so easy. Guess what - they are!

Last night I was in my closet preparing to go to bed. I spied a sweater I've been hanging onto since last year, even though it wasn't even close to fitting. My mind immediately went to the images of the cute, plump pumpkins from the net. Before I knew it, I was cutting it up.


First, I cut one side of the sweater out. As you can see, I cut around the arm openings.


Then I scoured my house searching for something to stuff it with. Ideally, you would want to use fiber fill or craft stuffing. I didn't have either. But, I had an old body pillow from my preggo days 6 years ago. It's just been sitting in a closet, so I thought, "let's tear that baby open!" CRAP! The stuffing inside was a mixture of shredded up paper, styrofoam and craft fill. What a mess I made pulling handfuls of it out!

After I plopped down a few handfuls of stuffing, I gathered up the edges and wrapped my hands around what would become the pumpkin stem. (Wow, I need to work on my photography skills - suddenly the sweater is grey!)


Then I tied a long piece of twine tightly around the stem.


Next, I took the long pieces from the stem and wrapped them down along the sides of the pumpkin and tied them at the bottom.


And like wrapping a Christmas gift, I then wrapped them back up the opposite sides, and made the final knot on the stem. This gives the pumpkin its ridges.


Next, I cut another piece of twine. And wrapped it up, up, up the stem. I knotted it off and that was it!
I also trimmed the tops of the sweater from the stem, so there wouldn't be so much hanging off.


I had the other side of the sweater, so I made a second pumpkin. I love the rustic, hand-crafted look of these pumpkins - they just feel like Autumn!

Monday, October 8, 2012

Halloween Party 2011

As Halloween approaches I think back to a year ago when we hosted a large party for the neighborhood kids. It was a ton of fun, complete with children in costume, spooky decor, fun games and delightful treats. I've always loved this time of year, and masquerade parties are at the top of my must-do list.

As I contemplate whether I can pull off another shin-dig like this in just a couple of weeks, I went back and looked at photos from last year. I thought you might get a chuckle out of them, too.


My little skeleton almost made mommy-the-pirate walk the plank!


The kid's goodie table.


We played many kids' games, like Mommy Mummy. I hit up Costco for tons of toilet paper and the kids wrapped their moms like mummies. It was great! A neighbor got this shot of me - so creepy!


Here's another mom all wrapped up! Talk about standing perfectly still!


This cemetery cake was so easy. Just use Milano cookies for tombstones and crush up Oreos to make dirt.


Severed finger shortbread cookies. Almonds make perfect finger nails, and raspberry jam turns up the gruesome factor!

We had a treasure hunt, played pumpkin bowling, had an eye-ball relay race, and beat down two pinatas. Once it got dark, we roasted marshmallows over the fire pit. My mother-in-law even read tarot cards for the adults!

I wish I had more photos of the decorating. I hung black and white lanterns from the backyard trees. And we had spooky creatures coming out of the ground.


It was so much fun - I can't wait for Halloween this year, too. What are some of your favorite Halloween moments?

Sunday, October 7, 2012

It was a paper-pumpkin party!

A month or so ago I hosted a paint demonstration at my house for some local gals. It was fun - we noshed, drank and chalk painted a hostess tray. While we sat and chatted, I proposed we start a neighborhood craft club. The idea was enthusiastically received, and we now have a Facebook group of 32 members, who will meet once a month to try out a variety of crafts.

Last night was our first meeting. Eleven women from our community came over to my house, where we crafted these adorable paper pumpkins.


The idea came from Better Homes and Gardens. (click for instructions on how to make them)
We tried heavy and light-weight scrapbook paper, as well as additional adornments, like tulle, raffia, twine, fabric leaves, ribbon, etc. And while the instructions didn't call for it, we stuffed most of them with colored tissue paper. The light-weight scrapbook paper just couldn't withstand the weight of the wine cork stems. Tip - the heavy card stock papers work great - no need for stuffing!

It was a really fun evening! We ate, drank a lot of wine, laughed and worked just about the whole time on these adorable autumnal creations. I loved how encouraging everyone was to each other, and the team efforts some of the projects became. Some of the women got super creative - like Gail, who hot-glued decorative ribbons to her strips of paper, and Jackie, who used fancy craft scissors to give her paper a special edge.

Here's some photos from the evening...


Our guest, Michelle, brought Cupcake Heaven! 
(That's really the name of the bakery and they tasted heavenly!)


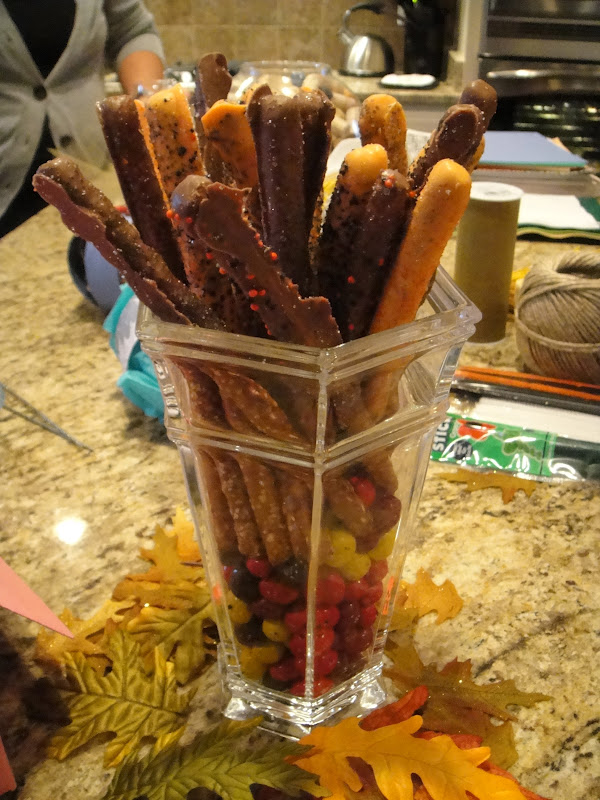
 Jackie, made these delightful candy-coated pretzel sticks to display in her Tiffany vase!


Liza took a break from cutting strips of purple paper to smile for the camera!


Tonia made this gorgeous orange sparkly version!


Someone had to drink a lot of wine to accumulate that many corks! 
(I swear its been a group effort over the past two years that we've lived in this neighborhood.)


Jen's lovely pumpkin in green and pink!
 

Pumpkin-making at its finest!


A bouquet I put together for the festivities.


 Gail displays her great black and orange pumpkin!


 Another beauty - love the raffia!


A butterfly found this one!


The pumpkin patch - delightfully colorful!


Next month our craft will be embossed travertine tiles - perfect for gift-giving. I can't wait! And we'll have a special guest craft demonstration in early December with the gents from Our Crafty Home! I am super excited to make a Christmas wreath with these guys! So please make sure to follow along as we share more monthly crafting parties.

Wednesday, October 3, 2012

Auction Cabinet is a Bleed Through Nightmare!

A few weeks ago I went to a local auction and found this vintage cabinet.


As you can see, this piece wasn't lovingly cared for. It was scratched all to hell, and someone thought it was a smart idea to cover the top surface with sticky contact paper. The first thing I did was take my Black and Decker Mouse to it, and sand away most of the stained surface. That little hand-held sanding device is a blessing! No joke, I wish I had discovered it a long time ago.

After sanding, I whipped out my Annie Sloan paint. Normally with Annie Sloan Chalk Paint, there's no need for sanding or priming. (it really does stick to anything!) But, since this piece was a mess, I had to get rid of some of the gunk first. Little did I know that even after removing most of the stain, it would rear it's ugly head later.

I painted the first coat in the dim light of my garage, and could immediately see pink starting to appear in the paint. The wood stain was bleeding through even a second coat. With the advice of some awesome painting friends, I purchased Zinsser clear shellac. Painted it right over the chalk paint, waited for it to dry and then went back to the Old White again. It worked like a charm.

The only trouble was that as I started to distress, I could see that darn pink again on the layers underneath. So, I just distressed it. A lot. To make it sort of look like it was all intentional. What do you think?


I removed the glass from the door and replaced with chicken wire, for a cottage chic vibe!


The original key!


Wow, can someone show me how to prune rose bushes? It's looking like a jungle out here!