Thursday, January 31, 2013

Making a pillow with a step-by-step tutorial

While I've been redecorating my front living room, I've had lots of suggestions from my Facebook friends on what to do. Someone suggested I needed another pop of my accent color - red. I have a stash of gorgeous red geometric Robert Allen fabric that I've been dying to put to use, so I pulled it out and made some pillows tonight.


Sewing definitely is not one of my strong points. I remember learning how to sew by hand from my great-grandmother, and taking sewing in high school home economics - but that's the extent of my education. Thankfully, making pillows is as simple as it comes, and a sewing machine makes the task easy-breezy. And perfection is not necessary!

So for anyone who hasn't tried their hand at pillow-making, take it from me, it's not hard. Here's how its done...


You'll need fabric, your pillow insert, or old pillows like the ones I was using (and planning to just recover), a sewing machine, thread, a needle and a pair of scissors.


Lay your pillow down over your fabric.


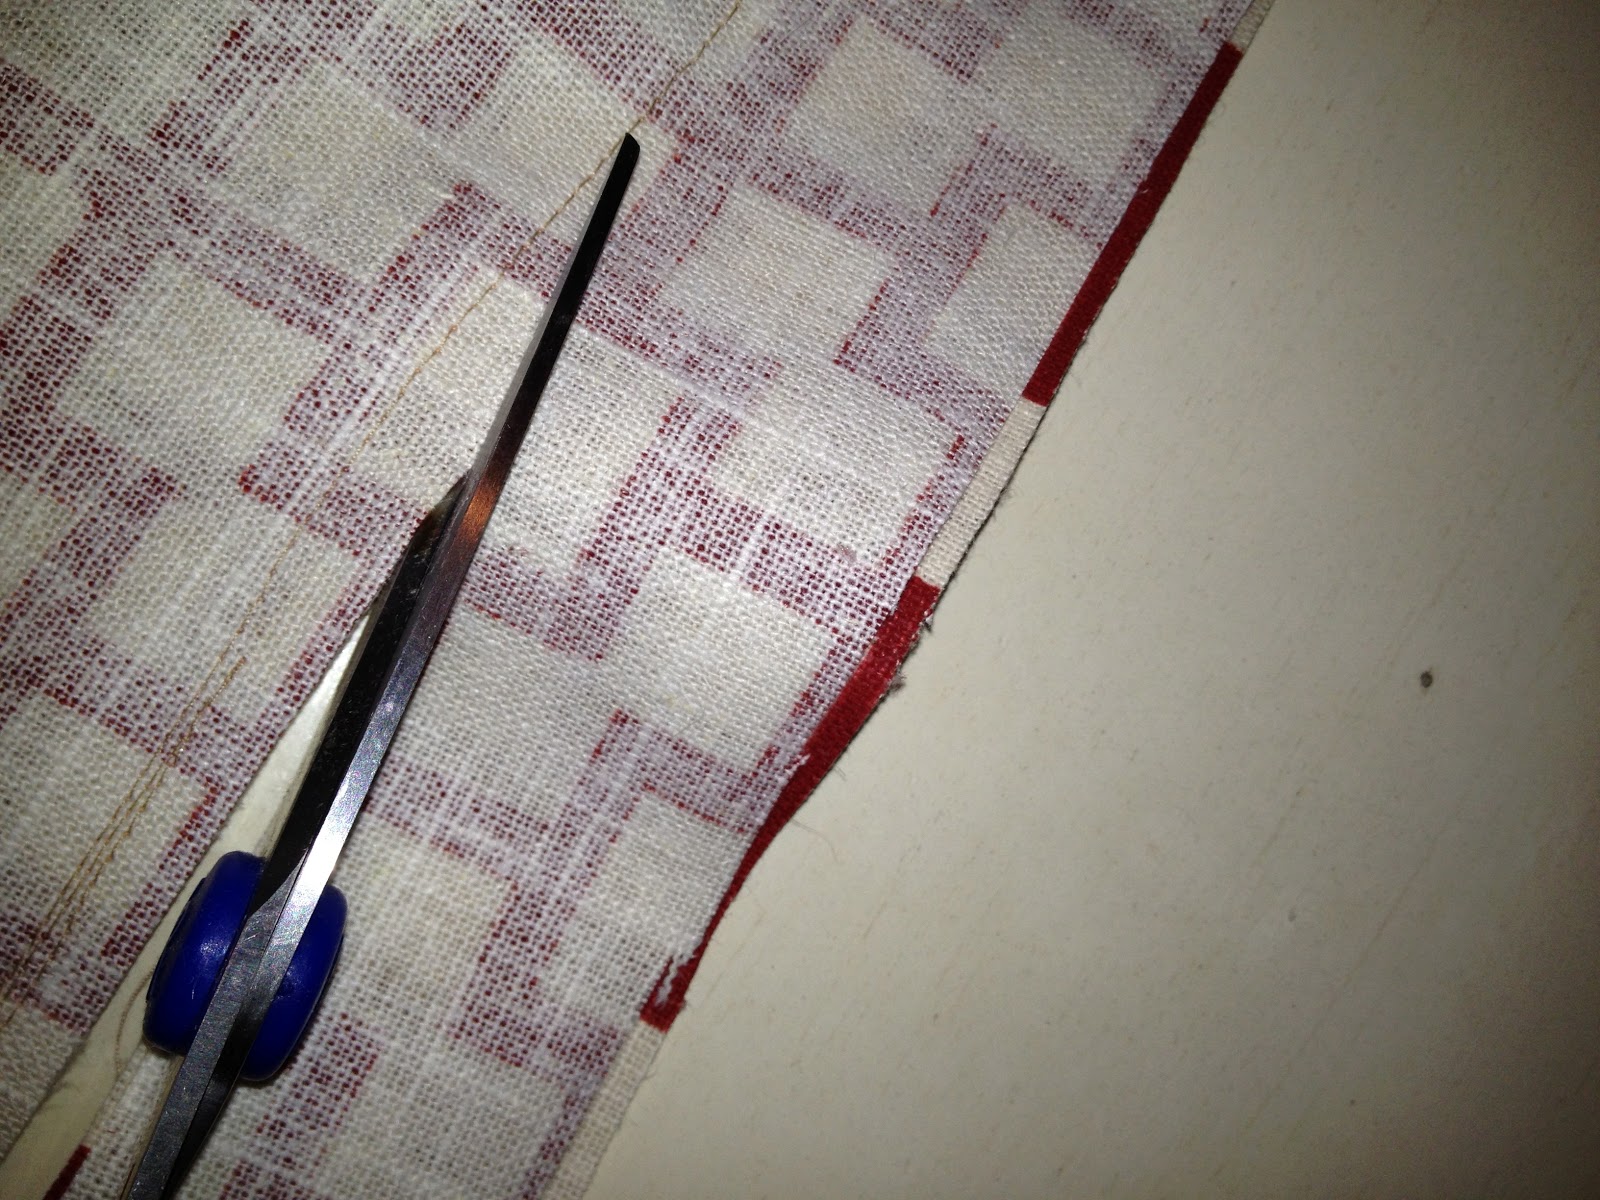
I left a good two inches around each side of the pillow's edge and cut. After you cut the first sheet, use it as a template and cut another sheet the same size.


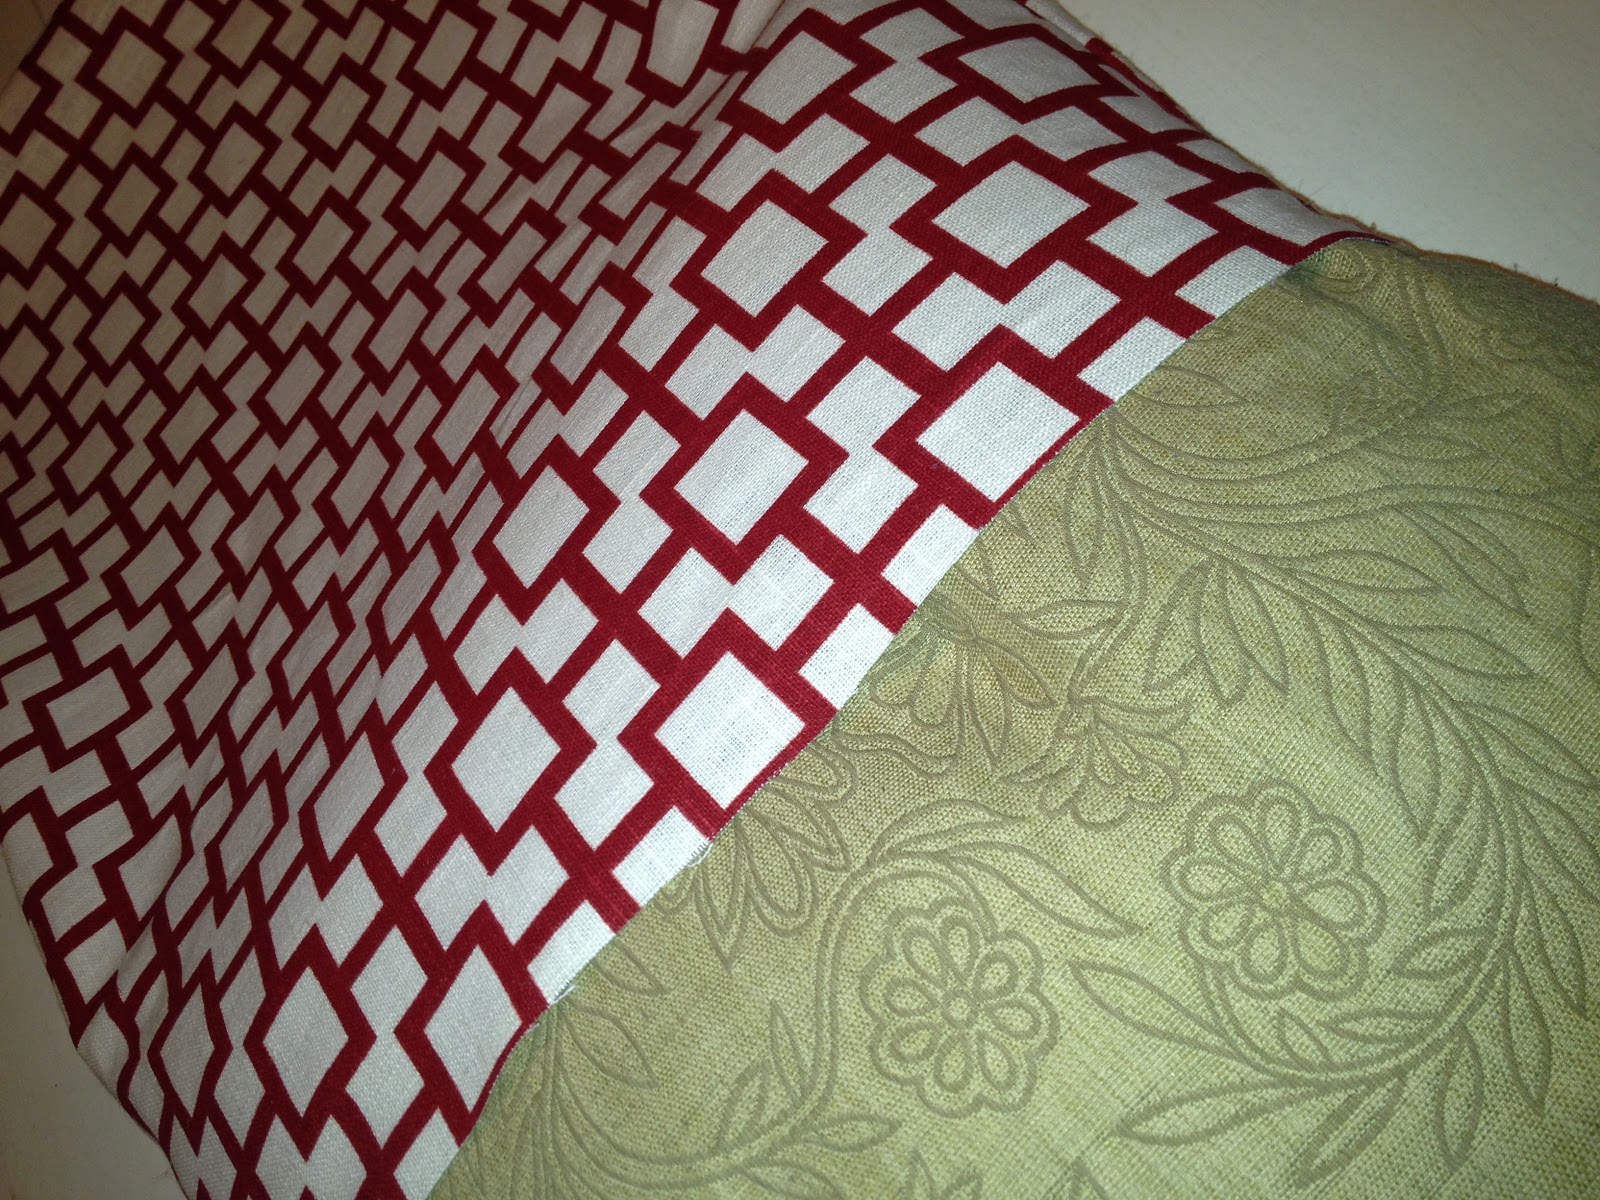
Lay your two sheets down so the printed sides are facing each other.


Sew up the left and top sides of the sheets. I sewed about a quarter inch from the edge. Don't worry about the fabric not being even. You can cut this away after you are done sewing, and it will be on the inside of your pillow, so no one will know its there!


Once the left and top sides are sewn, tuck the pillow inside, snug against the edges.


Next, using your fingers, gather the extra fabric along the right side of the pillow and insert pins along the edge of your pillow insert, so you know where to sew. (see below)


Now sew along the line you created with the pins, removing each pin as you get to it.


Once the right side is sewn up, again cut the excess fabric away.


Now turn your pillow case inside out, and insert your pillow.


See all the extra hanging at the bottom. We'll pin it along the edge of the pillow, just like we did on the right side.


Once I had the whole line pinned, I cut away about half this excess, so I was left with about an inch from the pins.


I folded the excess inch under...


And pressed the edges together. I hand sewed this side together. I am not sure what this stitch is called, but basically I went in one side with the needle, and the side I exited from was the side I went back in with for the next stitch. So in and out. On the first pillow I took my time and made very small stitches that were nearly impossible to see.


For the next pillow, I decided I would try that closing trick I see people do online - you know, the pro's. They sew up the last side of the pillow about half way, and then stuff the insert in, and hand-sew the remainder.


This is how much space I had left unsewn. Maybe a nice soft squeeshy pillow insert filled with features could have been stuffed in there, but my pillow wouldn't fit. I tried folding it in half, rolling it, pressing it. (I had flashes of giving birth and Saxon's giant head trying to squeeze through...well, I don't have to say it, you know what I mean.)


By the time I was done stuffing, I was starting to break a sweat, and I had torn the opening this wide! Oh well, lesson learned. For me, I was doing just as good a job hand-sewing the last side. So, I quickly sewed this shut by hand. Done!

And here they are, adding an extra pop of red to my living room!


Charlotte, the Green-Lantern wonder dog, approves!

Tuesday, January 29, 2013

The Elmer's Glue Technique

A friend of mine recently brought me this all-white armoire to paint for her toddler son's bedroom. She wanted to make it more masculine.


At first, we contemplated an antique blue color, and were going to decoupage old Sports Illustrated's pages on the doors. She's going for a vintage football theme - so cool! Then while she was getting her daily dose of eye-candy at HomeGoods (wait, doesn't everyone go to HomeGoods daily?) she spied this vintage looking cabinet.


She brought it to me, and said, "let's do this to the armoire." Okay I said, while thinking, "geeze louise how will I distress down the blue, without going past the black and showing the armoire's original white color?"

So, I consulted a Facebook group of painting gals that I belong to, who are real pro's. Most of them run retail shops, or furniture restoration businesses. I knew someone there could help me. And a great person, named Meghan Cobb did. You can check out her business page here.

She advised me to use Elmer's Glue to get that lifted off, chippy edge look on the blue paint. You can use Elmer's Glue to crackle paint, and there's a lot of YouTube videos out there that can show you the basics. Here's one I watched.

I wish I had taken step-by-step photos of this process, but its very messy and I didn't have someone who could shoot photos for me. Stopping to wash my hands was impossible. You'll understand in a minute.

So here's how this project went down:

1) I painted almost 3 coats of Annie Sloan Chalk Paint decorative paint in Graphite over the entire armoire. Then to give the grey color a deeper/blacker hue, I dark waxed the entire thing. I did not clear wax this piece.

2) Next I used Zinnser clear shellac to seal the graphite on the doors and drawer fronts, where I planned to do the glue/blue paint trick. Why this step? Because it allowed the blue to be lifted off without taking any of the black with it. We did not want to see any of the original white.

3) When the shellac dried, I thinned down some regular old white school glue. I used Elmer's All Purpose glue. I just added water and mixed it to a thin consistency. Next I spread that on the doors and drawer-fronts, working on one at a time.

4) I did not let the glue dry at all. I immediately painted Annie Sloan's Napoleonic Blue over the wet glue. Once it got tacky (in a couple of minutes), I used a paper towel to blot away the glue and paint around the edges. It worked perfectly and did not even begin to lift any of the black away.

5) To get some crackle, I pulled out my hair dryer and ran it over the wet blue concoction.

6) Once it was completely dried, I dark waxed over the entire surface again.

So here is how it turned out:


I hope she likes it!

Sunday, January 27, 2013

How shall I arrange my new furniture? UPDATED

New neighbors moved in across the street a couple of months ago and during a meet-and-greet party they hosted, the lovely lady of the house and I got to talking about furniture and decorating. In the course of the conversation, she revealed that she had two white slipcovered love-seats that she was selling. I was in the market for the very same thing, so I jumped on them!

You see, my old white couch and chair, which has served my family well for many years, will be settling down into our basement video game room in a few months.


With that in mind, I knew their replacements should also be a white or cream color, as I wanted to keep the same color palette in there. I really also hoped to find a slipcovered piece, one that would come off entirely, so I could wash it occasionally. Why? Because I have a 5-year old and a dog that love to lay on the couch in this room and stare out the front window. Or wrestle. Or wipe dirty hands/faces on the cushions.


As luck would have it, the new pieces fit the bill. They are a pair of chair-and-a-halfs, from Crate&Barrel. They look brand new! And they gave me a great deal on them - how could it get any better?!


So, here they are in the room. Gorgeous, right? Then why does something feel wrong to me about the arrangement?


Here you can see this room is right inside the front entry. As I come inside the door, something feels amiss. Do you think its because the room layout used to be more open? In my mind, this couch-facing-couch layout felt very contemporary and symmetrical. However, after I emailed the photo to my husband he said it looked "old-fashioned." What??????? As you can imagine, my doubts doubled and here I am fretting over how to lay out this space.


I love the new pieces, and do not think they look old-fashioned whatsoever. And in talking it over with hubby, I think he meant that the space looks more "traditional" than it had previously. I had considered moving one of the pieces against the window, but worry that Charlotte will want to sleep on it or get up on it to look out the window. I even went to far as to buy a bench at HomeGoods last night to put in front of the window for her.


But, its too wobbly for her to comfortably get up on. She attempted it once, and after falling off, she won't get near it now. So, its going back to the store.

What do you guys think? Shall I turn both of them around to face each other in the opposite direction?
Maybe I just need to get used to a more intimate sitting space. Maybe its the fact that the one piece is "floating" and I'm used to the furniture against the wall. Maybe I am just PMS-ing.

Check back in a week. I'll be in love with it!

UPDATE: 1/28/13

I consulted my design loving Facebook friends, and they gave me a bunch of suggestions. Here's the space now:


I moved the couches to form an L-shape.


I moved the red trunk under the window.


I got rid of the large boxy-shaped end table and large lamp. Those pieces worked fine next to a full-size large couch, but these demure little chair-and-a-halfs (or settee) needed something smaller in scale.
So now there's a glossy black stool-like table in its place.

I picked up a couple of grey pillows and that awesome gold-yellow rug, which turned out to be too small. (why do things always feel larger when they are folded up in the store!!??) So, I'll have to return it. BUT - I so badly want another yellow-patterned rug for this spot. Let the search begin!


Overall, I feel much better about this arrangement. It's more open, and "feels sexier," as my hubby put it. Heck, if he thinks it's "sexy," I'm sold!

Friday, January 25, 2013

Baby its cold outside, and the painting is at a standstill

A few weeks ago we had some record warm temps here in Northern Virginia. It was January and in the 50's/60's! But as all good things must come to an end, the thermostat dropped and this week it was frigid. Like 15 degrees cold! So painting in the garage is on hold until the forecast shows temps at least in the 40's.

Here's a large gorgeous piece I was able to finish before the Ice Age hit.

 BEFORE

AFTER

This gorgeous cabinet was painted hunter green inside and out. The client's decorating has changed and she didn't want to see any green on this baby anymore. To distress this piece and not have any green show through, I had to sand away the green paint in all the areas I planned to distress. Take a look...


I got out my truster Black and Decker Mouse and sanded off the edges - farther back than I intended to distress - so I could be sure the green didn't show through. For the most part, this was successful, although I will admit, tiny hints of green did appear in some of the finer areas, like the molding up top. But, when it was all done, those areas looked more like dark wood than green, and the client was pleased with the overall appearance.


It's painted with Annie Sloan Chalk Paint in Paris Grey on the outside. I clear waxed the entire piece to seal the paint. Then I distressed lightly along the edges, and dark waxed in select areas to give it an aged look. Don't you just love how this grey looks? 


On the inside I painted the shelves (plus two more not appearing here in this photo) and the entire inside in Old White. The dark wax on the bead board made this back really pop! 


This was a really big project, and I can't wait to see how my client decorates it in her home! While the weather was still nice, I started another big piece of furniture (for the same client) - this white armoire.


We're going to give it a more masculine appearance, and match the paint scheme to this piece of furniture.


I've already painted the whole piece in Annie Sloan's Graphite. And as soon as the temperature creeps back up next week, I'll work on that chippy blue effect. Wait till you hear about this - you do it with Elmer's glue!

While I was between custom projects, I got a great deal on this used shelf. It was originally black and I wanted it to be red to match my laundry room colors.


I brought it inside and painted it in my kitchen! This puppy was painted and waxed in just a couple of hours.


I think the washer and dryer are jealous!


Alrighty folks, think warm thoughts! And pray for Spring to get here soon!