Saturday, January 12, 2013

We Made No-Knit Scarves at Craft Club

This month our neighborhood craft club got together and made scarves. Except we didn't knit - we knotted. Intrigued? So was I.


Here's the project we based our craft from - Martha Stewart's No-Knit Scarf. So first, we went out and looked for some really chunky yarn.


Our neighbor, Lisa, led the craft, since she had done similar macramé knotting previously.


The next step was to cut 12 strands that were 108" in length. She said that would give us 9-feet, but that we'd lose about 1/3rd of it in the knotting and be left with a 6-foot scarf. So we all started cutting our 12 strands.


Chrissy, our hostess, used really amazingly soft and thick yarn! And she made delicious soup and sandwiches, too! (she's known in the neighborhood for her wonderful cooking!)

After the 12 strands were cut and ready to go, we had to secure them under the end of a clip board.


Then we separated them into 4 groups of 3 strands each.


The next step was to take the two groups of strands on the right and knot them as you would tie a shoe: overlap the two groups and then tuck the ends of one group through the loop (this sounds much more complicated than it really is - just pretend its a shoelace.)


Then do the same thing again, except this time, reverse the way you go into the loop. So, if the first time you tied you shoes you went over into the loop, this time go under. You are creating a square knot.


Repeat this on the left side with the two left groups of strands.


Now, take the two innermost groups of stands - and make the square knot by using the same technique explained above. Repeat the entire sequence, until you get to the end.


Lisa was really good at it.


Me, not so much.


Gail was a natural and finished quickly!


Somehow I ended up with about 8 inches of strands on one side and 3 on the other, so I had to stop and just cut the longer pieces off, which resulted in a smaller scarf then I had wanted. But, the scarf is warm and I love the color. I really enjoy Craft Club because it introduces us to crafts we may not have ever attempted otherwise. And its fun to get together with the ladies and enjoy food, drinks and girl time, while being creative.

Next month we are making pearl heart ornaments in honor of Valentine's Day - stay tuned!


Friday, January 11, 2013

I met Design*Sponge's Amy Azzarito

Yesterday I went into NYC to meet with a few of the authors I'll be doing book publicity for with Abrams|STC Craft (which really has been like a dream job for me). I met Amy Azzarito, who is the managing editor for the uber-popular website, Design*Sponge. She's also the author of the upcoming book, Past & Present: 24 Favorite Moments in Decorative Arts History and 24 Modern DIY Projects Inspired by Them.

I've talked with Amy on the phone before and she's always been super nice. Meeting her in person was no different - she was engaged, positive and had great ideas for spreading the gospel about her book (which I am psyched to work on as its all about DIY home decor). As I sat there listening to her, I kept thinking to myself, "I hope she doesn't mind that I want to be a groupie and take her photo!" She didn't mind.

Amy Azzarito (left) with her new book, Past & Present, and some woman on the right who needs a haircut!

Amy's book includes essays about some of her favorite moments in decorative arts history that pair with do-it-yourself craft projects for related modern decor. Check out some of the projects below!


 I myself want to try making several of the projects in the book! What a fun day I had...surrounded by books and creative people! Does it get any better?!!


Who doesn't LOVE a bargain!!

Its the new year and time to purge. I took a look around my house the other day and thought, "damn, there's a lot of STUFF in here." You know, stuff, that you sort of sit out on a shelf - maybe because it was a gift, or maybe because you found it in a moving box and wondered why you never displayed it. And over time, this stuff accumulates. Before you know it, its like you fed your stuff after midnight and your house if over-run with it! (giving my age away with that retro-movie reference to Gremlins)

So, I decided to get rid of some of it. Kitchen gadgets (can you believe I have 3 blenders), decorative things like pottery and wall-hangings, and even spare furniture that's not serving a purpose. In doing so, I made room for a find I'm so proud of I could squeal!

I found a pair of these cuties at a Ross store! Yes, I said it, a Ross store...the same place where you can find designer duds at a fraction of the price. Yup, they sell furniture too and the price is almost always right!

My chair for $119

I scored two of these petite accent chairs for just $119 each! Look at how lovely they are: tufted backs, piping, casters on turned front legs, and gorgeous linen script fabric.

Now hold your breath, because here comes the amazing part...I found my chairs' cousins on Amazon for $660 each!! (marked down from $825) Heck, these could be switched-at-birth siblings to my two chairs! The noticeable difference, other than the price tag, is the limed oak legs. Theirs are darker than mine.  But seriously - don't they look almost exactly the same?? I'm giddy with the notion that I saved myself over $500 a chair!

Amazon's chair for $600

Sorry to gush, I just had to share this steal of a deal with you guys. I was excited when I left the store, and even more over the moon after this discovery. Who doesn't love to find a super bargain!

Tuesday, January 1, 2013

2012 Project Highlights and Tips for Succes

January 1, 2013. Today's a day to reflect on the past year and plan for the future. And its been a good year filled with many changes. My family is happy and healthy, and professionally I couldn't be more pleased. The new book publicity job is going well, and this past Spring I rediscovered how much I enjoy painting furniture.

Between custom work for clients, and the pieces I painted to sell, the projects were, for the most part, highly enjoyable (excerpt for painting a few sets of dining chairs - oh they are a bear)! Here's some of my favorites from 2012 and tips for success:

My FAVORITE furniture makeover was the french chair...


This was so fun - I really loved the upholstery aspect of this piece, and I hope to do more chairs this year. If you're going to reupholster a piece, here's my suggestions to avoid pulling your hair out:

1) Invest in a good stapler - at least an electric one, or you will find you need a lot of muscle just to get them in flush
2) Save the pieces of old fabric you tear off to use as a template when cutting the new fabric
3) Buy more fabric then you think you will need

Here's the original posts for this project if you want to see and read more:
Ripping it Apart
Painting the Chair
The Reveal


The Antique Bedroom Set - a close tie for second!


Oh how I loved working on this set that included a queen headboard, footboard, side rails, a dresser, vanity and two huge mirrors. The furniture was beautiful, with amazing appliqué details, curves and rasters. Did I say I LOVED this set? And after the paint, I loved it even more. 

Tips for success:
1) Tape off your mirrors with green (Frog tape brand) painter's tape. Do not use the blue kind - or you will have bleeding. Trust me on this!
2) Invest in beautiful knobs - they make such a difference
3) When painting appliqués, use a small artist's brush and take your time

Click here if you want to see some before shots of these beauties.


Mona's Sideboard


This console was a custom paint project that I fell in love with. I swear when it was all said and done, I secretly wished it was mine! I hope to find a similar piece some day and paint it for my own dining room.

Tips for success:
1) Frog tape is great for getting crisp lines around edges if you don't trust a not-so-steady hand
2) Use dark wax sparingly for an aged patina. If you smear it over the whole piece, it will just look dirty.
3) Sometimes the lack of hardware truly makes a piece stand out. Don't be afraid to take it off and fill in the holes. But be sure you can easily open drawers.

Here's more photos!


The bench from hell


Sometimes a piece of furniture is so easy to transform you'll amaze yourself. At others, it's such a pain in the ass you could cry. This one fell into the latter category. And I have several posts to explain why linked below. BUT, what's important is that the end result. This pretty piece sits in my spare bedroom and when I walk past the room, I still find myself stopping to admire her. 

Tips (or maybe I should calls these bits of advice warnings):
1) You will get blisters when removing thousands of staples!
2) Upholstery needles are very long and sharp!

More links:
Removing cushions is hard work!
The next step - fabric.
Making the tufted seat.


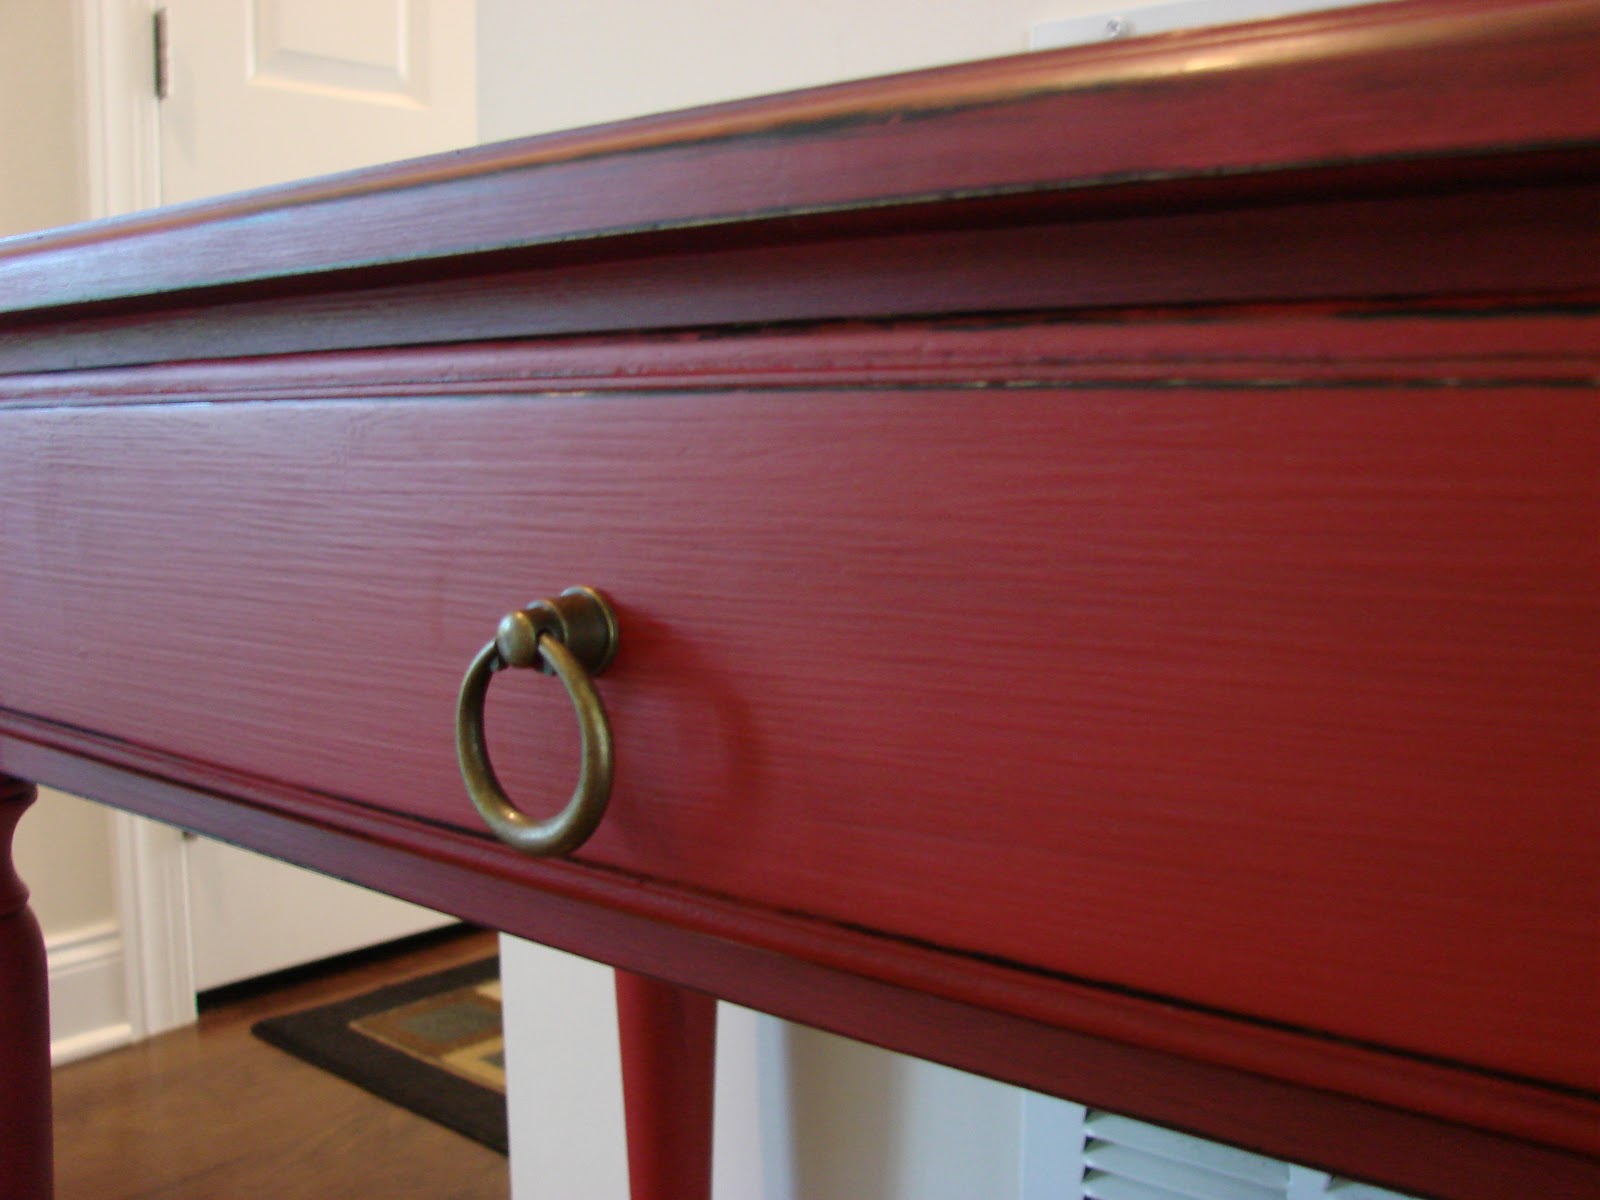
Little Red Accent Table


Okay, I have a thing for red. Love red accents in a home, and this piece turned out great with its black wood peeking out from underneath.

Tips:
1) Always remove hardware before you start painting, unless of course you plan to paint right over it
2) Don't be afraid of color. A striking piece will make you smile! The 2013 Pantone color of the year is emerald green - who wants to try it out first??!!

Click to see more photos of red furniture.


Gorgeous Wood Plank Desk


This gorgeous desk was also a custom project. The stunning plank top was to die for! I'm not kidding, I'd go out in the garage and just run my hands over it. Just. Beautiful. Wood.

Tips:
1) The Black and Decker Mouse is an awesome little hand-sanding tool that strips off old surfaces so quick and easy! Perfect for smaller hands and very light-weight. 
2) If you don't like your wood to have a shiny surface, make sure you use a matte finish. I prefer Minwax Wipe On Poly. They even make a wipe on stain too, that you just brush on, let sit a few minutes and then wipe off. Easy-breezy!!


Annie's Secretary


This was a pretty custom project I enjoyed doing. It started off solid black. We used Annie Sloan Chalk Paint in Paris Grey, and Old White. 

Stenciling tip:
To avoid stencil bleeding, always make sure to wipe your brush on a paper towel to remove excess paint, before you begin stenciling. Each time you reload your brush, wipe first. This will keep paint from seeping underneath the stencil and giving you that blurry edge.


Decoupaged Kitchen Storage Cupboard


This petite cupboard made my favorite list because of the shabbiness and it's decoupaged interior doors.  Truth be told, I was completely out of Paloma (the purplish color) and Old White paint when I discovered that I had failed to paint the insides of the doors. I was taking this piece to a sale the next day and I had to do something. In a pinch I decoupaged the doors with Modge Podge and scrapbook paper. I loved the surprise of opening the doors and finding the design!

Decoupage tips:
1) Make sure paint is dry before you decoupage over it
2) If air bubbles form, pierce it with a pin, then smooth out with your fingers
3) Avoid using ink-jet printed designs, as the ink can smudge from your decoupage medium


French Coffee Table


The french coffee table was one of my fav's this year too. The piece was curvy, with scrolls and shell motifs. I chose to dry-brush Old White over Paloma and it created a lovely layered look.

Dry-brush technique tip:
The dry-brush technique is literal - you load a small amount of paint on your brush, and then wipe most of it off onto a towel or rag before you start painting. Keep the brush very dry to deposit very fine amounts of paint on the surface.

More photos here.


Gold Gilding Column Table


I loved this little piece of furniture for its many crevices. Turned grooves allow dark wax to settle in and create such a perfect, distressed and aged look. Gold gilding wax also looked great on those column legs.

Gilding wax tip:
A little goes a long way! Seriously, use a fine-tipped brush and wipe it back to get your achieved luster. Let it set and then buff lightly. Ahhh - so rich!

More photos here.


As I think about the coming year and the things I'd love to take a brush to, a list is quickly developing:
1) A stenciled accent wall in my powder room
2) A mammoth hutch
3) My kitchen cabinets (I just want to wax them. They're already an antique white color and I think the dark wax would make a huge difference!)
4) I've got about 5 pieces of furniture in my house that need a makeover, from dressers to a storage bench.
5) A TV console
6) A mini bar
7) More French chairs

I'll stop now. Heck, I'll paint just about anything! Give it a try folks - I think you're gonna love it!


Monday, December 31, 2012

A new powder room mirror sparks a full-fledged renovation!

You know that phrase that talks about a spark starting a fire? Well, in this case a mirror is sparking a full-fledged powder room makeover. And I am so excited!!

This mirror was a thrift shop find I scored for about $15. I loved its scrolly-top and the mirror was in perfect condition. It came home with me and got the Annie Sloan Chalk Paint treatment in Old White with clear and dark wax.


Since it didn't sell at the holiday show I exhibited at, I brought it home and claimed it for my powder room. We built our home 2 years ago, and the powder room was pretty standard, with the builder-grade oval frameless mirror. So, I took it down, patched and painted the holes, and hung Miss Pretty over the sink!


I snapped this quick photo, posted it to my Facebook biz page, and knew immediately that this room needs paint! White walls do nothing to accentuate the curves on the mirror. I want it to pop out at you as the showpiece in the room (even though it will have to battle it out for the title against the fabulous ironwork shelf). A quick survey about paint colors generated some of my highest ever Facebook stats! Many of you said to paint it a various shade of blue, or plum, or chocolate brown. I'm still on the fence about the paint color, BUT, I know exactly what I intend to do in my space to give it some pizzazz...STENCIL!!


This moroccan beauty is available on Cutting Edge Stencils. I'm going to purchase this stencil and do one wall with it.

TIP:  I had a friend ask how to do this without having bleeding edges (when the paint seeps under the stencil and your edges are not crisp). I watched several tutorials on Cutting Edge's website, and the trick  is to wipe paint off your roller onto a paper towel, before you apply it to the wall. The same goes for furniture, whether you stencil with a roller or a brush, always blot your tool on a paper towel to remove excess paint!!

I plan to tape off the toilet and sink, and go to town. But first, I need to find a new light fixture for over the mirror. It too is builder standard and not attractive at all. I'd love to find something really cool, like a barn light. If you know of a great, inexpensive source, share the love!

I'd like to get this work all completed in the coming month, so I can surprise hubby when he gets home again. Stay tuned, there will be a tutorial video coming for this project!


Sunday, December 30, 2012

Time to play blog catch up - a recap of what I've been up to lately

Has it really been a month since I blogged? I'm sorry folks, time has really gotten away from me this past month. I can blame it on a lot of things, like being uber busy with work (both painting and book publicity), preparing for the holidays, or one of the biggest events that sucked me dry - a holiday show that I painted several large pieces of furniture and accessories for. So let's start there - with a recap of the show...

The Holiday Extravaganza show was a huge success for me. I sold all of the furniture I took, and nearly all of the small decorative pieces as well. And more importantly, I made many contacts with people interested in custom paint work. It was so fun to see many of the friends I have made on my Twig and Twine Facebook page, as well as my son's teachers, and our neighbors. And my hubby was home! So I had his muscles to help with the heavy lifting - thank you baby!

Here's a photo of my space:


Since the show, I've done no painting. I took the remainder of December off to decorate and prepare for the holidays. We put up a couple of trees.


And crafted gingerbread houses for my son's kindergarten class.


We had out of town family come for a visit, too. Here's a first - I made a breakfast pizza. (I'll stick to painting!)


Our family celebrated the holidays a bit early this year, as hubby had to deploy before the 25th. But, it's okay, he got to see Ohio State beat Michigan, so all was good!


We also began a major basement renovation. Well, not really we...a construction company is doing all the work. But, we get to make a lot of design decisions, so that is fun. Phase 1 is complete, which included a week of major noise (poor Charlotte was hiding in the closet for most of it). They finished all the framing, HVAC, plumbing and electrical. Here's a sneak peek...


We had selected pendant lights for the bar area that turned out to be too big for the space. So, instead of returning them, we hung them over our kitchen island. I LOVE them! In fact, I think they are perfect for our kitchen (which probably means they wouldn't have been perfect for the basement bar). See, everything works out like its supposed to!


Christmas morning came and we opened Santa's gifts, which included Skylanders and a pooping reindeer for Saxon.


Charlotte enjoyed her new comfy sherpa blanket.


And hubby gave me a fabulous new I-Pad mini - perfect for the mass amounts of reading I love to do! Mother-in-law gave me gift cards to Home Goods and Pottery Barn (she knows me so well)!
With those I bought a weathered wood mirror and a lantern.


We did some traveling to see family and are now having our first evening alone, with nothing to do, in weeks. Hence, why I am sitting here, able to play blog catch-up. My lack of blogging has been eating at me. I laid in bed thinking, "I have got to get on the computer and write something!"

And speaking of writing, here's something that perhaps I shouldn't even mention, because its so far from being a reality at this point. But, it was flattering and exciting nonetheless...I was asked to consider writing a how-to project book for painting furniture! If more develops on this topic, I'll be sure to let ya know.

So, the holidays are almost over and I hope to be more regular with my blogging. And with the New Year comes resolutions for things I hope to do with the blog. Of course I want to grow my blog and Facebook audience, and to do so, I want to provide a lot more how-to. I plan to provide more tutorials for craft projects, for painting, and other decorative goodies I have in store. So, please come along into 2013 with me...and always feel welcome to leave comments, concerns, requests or questions! Happy New Year my Nester friends!