Here's said chair in it's BEFORE state...
You can probably see why I didn't want to just plunk her down in my living room as is. First, this fabric was worn, and second, it smelled like a grandma. Plus these colors were drab. I knew these gorgeous arms and legs could be spectacular with a paint job.
So, hubby and I got to tearing off the dated fabric, welting and pulled lots of staples. You can read more about that process in my earlier post here.
But, here's what she looked like underneath...
You can see the little horse hairs sticking out through the seat - a sign of a well-made chair!
Next I painted the wood with Annie Sloan Chalk Paint in Coco for the base and Old Ochre, with dark wax. More about that here, as well.
As I was nearly completion of the paint I had been out looking at fabrics. I ordered 2 Robert Allen home decor fabrics in a black and red combo. I chose these bold colors because I wanted something very geometric and the room is a palette of grays with red accents.
This one arrived...
The other did not. I had waited nearly 3 weeks to find out the black floral motif was discontinued. Grrr!
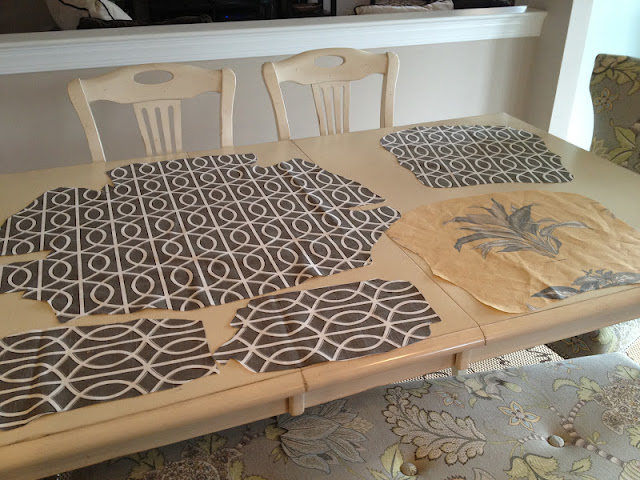
So, I visited the Fabric Emporium in Warrenton, Virginia and changed gears on the red/black vision in my head. When I saw the yellow and grey, I knew this was it! Went home and traced the pieces of old fabric I had torn off.
Then I started the staple process. Let's just say I need to invest in a pneumatic staple gun, as there must be an easier way to do this. With the electric stapler I purchased, I had to use all my weight to push the gun down onto the wood, in order to get the staples to sit flush. Most went in crooked, if they went in at all. I was at my wit's end at times. I would work for an hour and then walk away disgusted. So many staples were yanked and tossed in the trash. But, finally, I finished, and felt amazed at how good it looked. All it needed was a bit of braided trim to hide the staples and voila! Fresh, feminine and contemporary - I love how it turned out!
I made this little pillow slip-cover with leftover fabric by sewing together 3 sides of fabric and sliding in a pillow insert.
Tips I'd give to anyone else who wants to tackle a chair makeover (since this was my first and I learned lessons the hard way):
1) Allow an extra 1"-2" of fabric along the edges of your templates (the old fabric you wrapped off). If you trace right along the edges you might find it's too tight to staple on properly. I had to redo the seat as the first piece I cut was too small. How that can be possible I'll never know. Just take my word for it.
2) Make sure you buy enough trim. I seriously underestimated how much I needed. I went home with 4 yards, and when I went back, they were out! Had to go to another store in another town. Lost a day there.
3) Use a pneumatic staple gun. Seriously. Why work so hard?
4) Blow a hair dryer over the trim to evaporate any glue gun strings. But, don't hold in one spot too long, or you'll loosen the bond.
And of course, enjoy your handiwork! I am!


