So what is wallscaping you ask? It's my made-up word for dressing up your walls. You've probably heard of gallery walls, where you group photos into a pleasing arrangement on your walls. Wallscaping takes it to the next level. Like landscaping where you plant flowers and greenery in various heights and colors to achieve a cohesive look, wallscaping follows the same principles.
You can use a variety of photos, mirrors, frames, collected items, antiques, sports equipment - really just about anything - and arrange it on the wall in a pleasing manner. Wallscapes can be coordinated by color, theme, size, or shape. Sometimes the groupings are symmetrical, others haphazard. Always completely interesting!
Here's some examples from the Pottery Barn catalog that inspired me to create my own wallscaping.
Of course everything Pottery Barn does looks great and the above example delivers. Love the Americana theme, and use of items in a variety of shapes. The oars are unexpected, yet create the rectangular shape and draw the eye across the top.
Here they keep the look consistent with black frames, and throw in a few circular pieces to keep it interesting! This is one of my favorites - its like a museum exhibit!
Again, this space makes use of the black frames, but throws in a few antique-inspired pieces to keep it interesting.
A few of my friends have wallscaped their spaces, too. My friend Tara did this wall in her rustic-themed basement (it's so cool, there's real whiskey barrels down there serving as side tables!). I love the use of large and small pieces.
Tara is a professional photographer (you can see her work
here), and takes full advantage of her gorgeous children as models. Here she created a gallery wall along the staircase. Awesome frames!
My friend Hillary is a master of wallscaping! Check out the nursery she designed for her new baby. Of course, the theme here is little-boy inspired with a fishing rod, antique toy cars, alphabet letters, and more. Isn't it downright adorable!!
Here's a pretty display in her living room, too!
So, after all the drool-worthy inspiration, I was motivated to create my first wallscaping, too. I thought I would document the process for you here, so you can create your own wallscaping.
Steps to Creating Your Own Wallscaping
1) Find your space. I have a 2-story great room with really, really large walls. They are an overwhelming blank canvas, that I have fretted over for 3 years. It was only recently that I felt I could tackle a big project like this. So, I decided this wall was it!
2) Gather your items for the wall. You may have precious family photos you want to display, or heirloom antiques that deserve some spotlight. Maybe you have a movie-theme in mind for your man-cave, or boating items for a nautical theme. Put all your goodies in one area and look at them to determine how much space you need vs. how much space you have.
3) Take your piece that you want to be the focal point and hang it on the wall. For me, its this antique frame I scored for a couple of bucks at a yard sale. Then map out the remainder of the space you plan to use with painters tape. Don't worry about getting the lines straight. You'll use a level when hanging the items. Measure the height and width with a measuring tape.
4) Using your measurements, layout the same sized space on your carpet with the tape. This is your staging area.
5) Start experimenting with layout. Move items around. See what you like. At first, I thought I wanted my big frame off-center. I laid it down first, and began adding items around it. I started with the circle basket on the top right corner, then went for balance by adding the circle mirror on the bottom left next. After I had everything in my space, I took a photo to remember the layout, in case I changed it and wanted to go back to what I had originally done. This layout didn't float my boat. Something felt "not right."
6) Then I tried another layout, in which I put the focal point in the center. I liked that better.
7) Items to gather before you start hanging to keep the process moving: a level (make sure you level everything, especially big pictures and shelves), hammer, drill, screwdriver, pencil, tape measure, nails, wood screws, drywall anchors, and those easy to hang wall hanger things that are hook-shaped. They are a breeze for hanging light-weight items in drywall without a stud. Where there are studs you'll need to use nails or screws, and where there's just drywall, the hook things are great. Or use the anchors. Measure and remeasure or you'll have one too many extra holes in the wall. (take my word on that)
7) I started with my focal piece (the big frame) and worked from the 4 corners in. I slowly added pieces by holding them up on the wall and adjusting the spacing as necessary. Be flexible and adjust your layout as you deem necessary. For some reason, things might not look as good on the wall as it did on the floor!
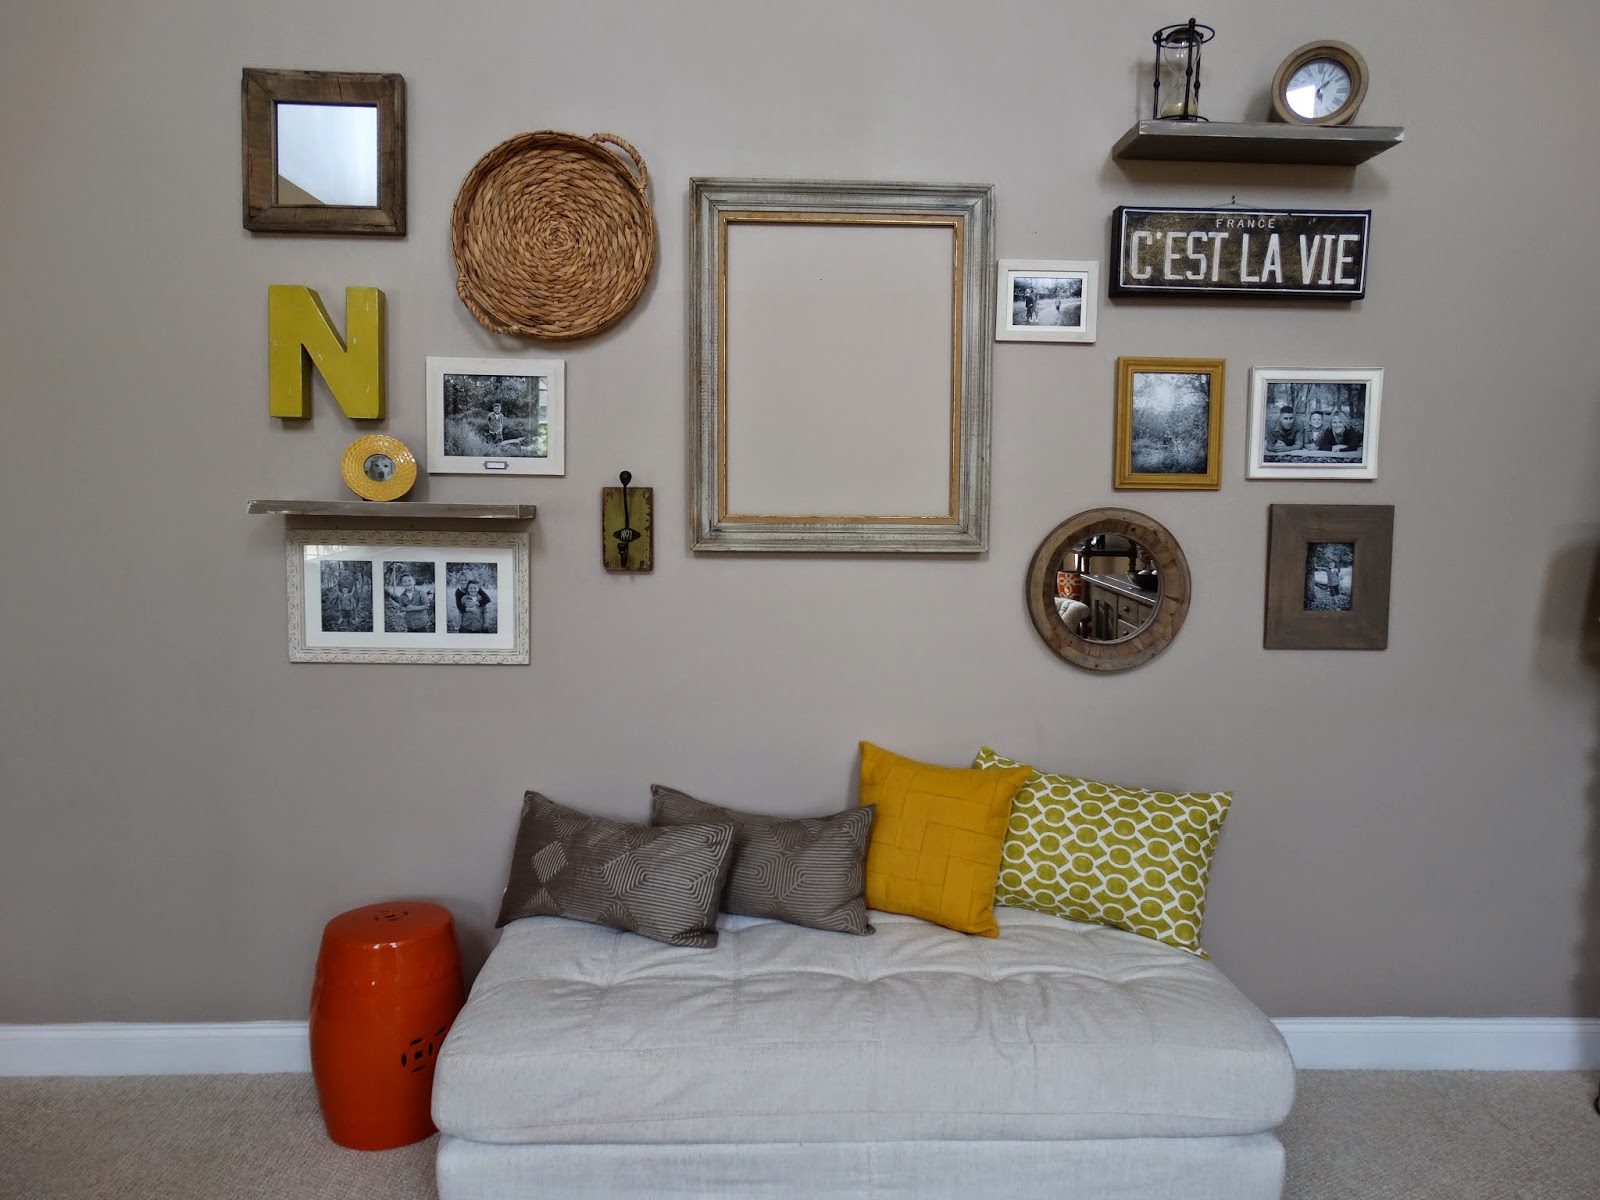
Here's what I ended up with!
I've got a mix of family photos, mirrors, an art canvas, metal initial, and other odds and ends. I wanted a variety of textures in neutral tones to match my decor, along with an accent of yellow.
My black and white family photos were taken by
Tara Sutherland, who I mentioned above. So beautiful!
Inside the frame I plan to hang the piece de resistance - a Simply Said vinyl design. It looks like this!
It's the big one that says "Always believe that something wonderful is about to happen." I had it designed in a chocolate brown color to match my accent wall across the room.
I'll be hanging it as a demonstration at my Simply Said business launch party, scheduled for June 6! I am super excited about it - because this new opportunity fits right in with my love for decor. The Simply Said designs are perfect for wallscaping - in fact, I think its the perfect way to showcase their wonderful messages, or to personalize your space. Look for a lot more ideas using Simply Said designs in coming blog posts - my brain is overflowing with fun things - wait and see!
Speaking of wait and see - as soon as I have the design hung inside the frame, I'll update this post with a final photo - so you can see just how striking it becomes.
And here it is!!!!!!!
Stay tuned for a link to my Simply Said website! Coming May 28th!
Thanks friends!